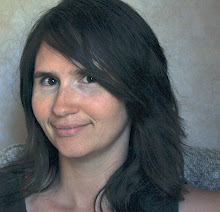
Deborah was a little nervous about trying knitting - she was thinking that two needles would be too complicated compared to one hook. She told me that she wanted to knit something that was a simple as possible, but still something that she could wear, so she thought a scarf would be nice. We went through my stash and she fell in love with some Bernat Handcrafter Cotton called Vintage Wine Ombre & will be using 6.0 mm needles.
Then the teaching began. I skipped showing the chain stitch to Rachel, my reasoning being that it is often difficult for a beginner to get the tension right, and it can result in frustration & wanting to quit before a good start is even made. Instead, I made the foundation row for her so that she could start with making the single crochet stitch right away on her project. The biggest obstacle was getting Rachel used to holding the hook - I have always used the "pencil hold", so I started with teaching Rachel this, but this just didn't work for her. I suggested that she then try to hold it like a knife & so she started stitching that way. I think this is probably the most important thing about teaching any craft - being open to the possibility that there is more than one way to accomplish the same end result.
The next step was to get Rachel to relax her hand, and not have a death grip on the hook, so that she could manipulate it more easily when making her stitches. When your student holds their hook, it should be a firm grip, so that it's not flopping all over the place or being constantly dropped, but you should be able to still slide it out of their fingers - if you can't budge the hook from your student's hand at all, they are holding it way too hard! I checked Rachel's grip every few stitches, just to make sure that she didn't tighten up as she was going along. After about 5 minutes of this, Rachel had trained her hand pretty well, and had switched her hold on the hook (completely on her own accord) to the pencil grip - go figure!

Rachel & a close up of her work - great job!

Now that I had one happy little crocheter, I moved on to Deborah.
Deborah already had 4 years of experience with crochet, so I knew I wouldn't have to worry about issues with gripping the needles too hard or holding the yarn too tight. My main concern was that she is left handed - I can write, crochet, play tennis & many other things with both hands, but I when it came to knitting, I could only figure out the English method, not Continental. I had thought that I taught Deborah how to crochet left handed - "No you didn't, Mom - I crochet with my right hand."
Oh.
Well there you go, I stood corrected - and now I was relieved that I could just teach her the way I learned. I showed Deborah three different methods of casting on: the single cast-on, double cast-on & knitting on. I then explained to her when one would usually use the different kinds of cast-ons. Knitting on is commonly used for adding stitches to an already started item; single is used when you want the selvage to to be less noticeable - like when making lace. The double is a good all around stitch - most patterns will use this if it doesn't indicate what kind of cast-on you should use - it is also one of the easiest cast-ons for a beginner to use. I showed Deborah how each cast-on looks as it is knit into so that she could see for herself how the tension worked with each one. After that, she decided to go with a double cast-on for her scarf.
Deborah did three rows of the knit stitch, then we did a few rows alternating purl with knit so that she could see how the stocking stitch formed. She said that she wants to keep with the garter stitch throughout the rest of the scarf, but ending it so that it has the little bit of stocking stitch to match what we did at the start. Deborah then told me that knitting wasn't as hard as she thought it would be & is happy that she decided to learn how to do it. I think she just may be planning more projects already :)

And here's Deborah - love the colour she chose!

So there you go - one crocheter & one knitter. I've done the first part of my pledge, now I just have to find somebody in the neighbourhood to convert into a fiber artist :)

