Sunday, April 5, 2009

Crochet Pledge Progress - Day One - Part Two

Though I never got around to posting again last Thursday, both the girls made a wonderful start that day.

Deborah was a little nervous about trying knitting - she was thinking that two needles would be too complicated compared to one hook. She told me that she wanted to knit something that was a simple as possible, but still something that she could wear, so she thought a scarf would be nice. We went through my stash and she fell in love with some Bernat Handcrafter Cotton called Vintage Wine Ombre & will be using 6.0 mm needles.

Then the teaching began. I skipped showing the chain stitch to Rachel, my reasoning being that it is often difficult for a beginner to get the tension right, and it can result in frustration & wanting to quit before a good start is even made. Instead, I made the foundation row for her so that she could start with making the single crochet stitch right away on her project. The biggest obstacle was getting Rachel used to holding the hook - I have always used the "pencil hold", so I started with teaching Rachel this, but this just didn't work for her. I suggested that she then try to hold it like a knife & so she started stitching that way. I think this is probably the most important thing about teaching any craft - being open to the possibility that there is more than one way to accomplish the same end result.

The next step was to get Rachel to relax her hand, and not have a death grip on the hook, so that she could manipulate it more easily when making her stitches. When your student holds their hook, it should be a firm grip, so that it's not flopping all over the place or being constantly dropped, but you should be able to still slide it out of their fingers - if you can't budge the hook from your student's hand at all, they are holding it way too hard! I checked Rachel's grip every few stitches, just to make sure that she didn't tighten up as she was going along. After about 5 minutes of this, Rachel had trained her hand pretty well, and had switched her hold on the hook (completely on her own accord) to the pencil grip - go figure!


Rachel & a close up of her work - great job!


Now that I had one happy little crocheter, I moved on to Deborah.

Deborah already had 4 years of experience with crochet, so I knew I wouldn't have to worry about issues with gripping the needles too hard or holding the yarn too tight. My main concern was that she is left handed - I can write, crochet, play tennis & many other things with both hands, but I when it came to knitting, I could only figure out the English method, not Continental. I had thought that I taught Deborah how to crochet left handed - "No you didn't, Mom - I crochet with my right hand."

Oh.

Well there you go, I stood corrected - and now I was relieved that I could just teach her the way I learned. I showed Deborah three different methods of casting on: the single cast-on, double cast-on & knitting on. I then explained to her when one would usually use the different kinds of cast-ons. Knitting on is commonly used for adding stitches to an already started item; single is used when you want the selvage to to be less noticeable - like when making lace. The double is a good all around stitch - most patterns will use this if it doesn't indicate what kind of cast-on you should use - it is also one of the easiest cast-ons for a beginner to use. I showed Deborah how each cast-on looks as it is knit into so that she could see for herself how the tension worked with each one. After that, she decided to go with a double cast-on for her scarf.

Deborah did three rows of the knit stitch, then we did a few rows alternating purl with knit so that she could see how the stocking stitch formed. She said that she wants to keep with the garter stitch throughout the rest of the scarf, but ending it so that it has the little bit of stocking stitch to match what we did at the start. Deborah then told me that knitting wasn't as hard as she thought it would be & is happy that she decided to learn how to do it. I think she just may be planning more projects already :)


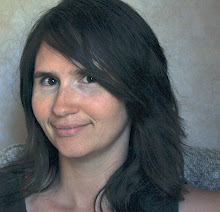
And here's Deborah - love the colour she chose!


So there you go - one crocheter & one knitter. I've done the first part of my pledge, now I just have to find somebody in the neighbourhood to convert into a fiber artist :)

Thursday, April 2, 2009

Crochet Pledge Progress - Day One - Part One

I've had to catch up on some paperwork earlier this week, so I didn't get to fulfilling the actual teaching of the skill part of my pledge just yet. However, I'm going to be teaching two students now. My oldest daughter, Deborah (12), has decided that she wants to learn how to knit (I already taught her how to crochet when she was 8). This is going to be one fun fiber week for me :)

Rachel has already decided on a project for her crochet lessons - she wants to make a snuggle pillow for her younger brother, Zach, in time for his 4th birthday (shhhh now, it's a secret). I think a snuggle pillow is a great choice for a beginner - you only need to have two squares made, and because it's purpose is for snuggling, a pillow form isn't required - it just needs to be stuffed with fiber fill to give it nice "squishability".

We've determined Zach's favourite colours by sneakily asking him which ones he likes best during a lunch time conversation. Blue is his number one, followed by green & orange. I have in my stash a huge bag of blue superwash wool that's a worsted weight (4 - medium, if you go by the standard yarn weight system). We'll be using a 6.00 mm crochet hook to work it up with. If Rachel is suitably comfortable after learning single crochet, I may teach her how to do some simple colour changes so that we can incorporate some of the green & orange into the pillow.

I'll be back later with Deborah's choice & how we've progressed

Friday, March 27, 2009

Take the Pledge - Teach Crochet or Knitting

National Crochet Month is almost at an end, so why not let it go out with a bang - teach somebody how to crochet! Angela Pallatto, Editor of Knit Luck, came up with a great idea to help encourage others during the economic slowdown - take a pledge to teach somebody to knit. I talked her into accepting crocheters too, as though I knit, crochet is much more so my passion :)

I've already signed up, and my own personal goal is to teach my youngest daughter (8) first, then to teach at least one other young lady in my neighbourhood. I'll post about how it all goes here on this blog at least twice a week, with some smaller updates put up on my Twitter account - which you can see at the right sidebar of this blog or by following me by clicking on the link just below it.

To get to the pledge, just head over here: Teach Knitting or Crochet Pledge

You don't have to blog or tweet about it, but I personally think it would be cool if you let us all know how it is going, so that we can encourage each other.

Happy Teaching :)

Sunday, March 22, 2009

Me, the Sheep & Ewe

Here I thought that I would be better at updating this blog, due to the easy access I have to it online, but I've certainly been wrong about that! I have recently discovered the simplicity of posting on Twitter, which has not only sucked me away from blogging, but other self-imposed crafting responsibilities. Still, it's nice to only be committed to 140 words at a time when I sit down to write. :)

One of the crafts related things that I'm working on is getting a whole lot of raw wool ready for resale (thus the Baaa-d pun in my title - oops, I did another one again!). I've never worked with raw wool before, and it has been an exciting adventure for me. Let me tell you, any misconceptions I had about sheep being white & fluffy has been completely thrown out the window.

So, for a reminder to myself how bad wool cleaning can really be, I offer up my top 10 list for what I experienced during my wool processing adventure:

10: White fleece that looks only slightly dirty dry, is actually really disgustingly filthy when wet.

9. The ratio of water/detergent mix to raw wool should not be 70/30, but rather 99/1

8. You have to clean the fleece before washing it. Not only must you skirt it, and shake out the debris, but a vacuum is recommended

7. It's probably not a good idea to shake out the debris on your kitchen table while somebody's plate of food is nearby.

6. Wool with very high crimping in it (the Lincoln lamb's wool that I had in particular) felts nearly instantaneously when it hits the hot water, even without agitation.

5. Lanolin smells nice on my hands, but not my kitchen counter, table or sink.

4. Like babysitting doesn't prepare you for childbirth, reading up & watching Youtube about washing wool won't prepare you for doing it.

3. I have a greater appreciation for the price of wool. People who hand wash & spin it should be allowed to charge at least $50/2 oz. skein

2. So much stuff can hide between the hairs. Even after cleaning I still found more dirt, more grass, more sticks, small animals, a child...

1. Despite all the above, I'm a glutton for punishment, because I'm going to clean four 30 lb barrels of wool before I've processed it all.

Anybody wanna buy some raw wool?

Seriously, if you want to be a brave DIY & try out some raw wool, just contact me through my profile & let me know how much you would like. I don't know much about grading, but I can easily get the answers to specific questions about the wool from the shepherd who gave it to me. I do know that most of the fleeces I have are from Lincoln ewes - some is lamb (first shearing), and some is second shearing, there might be some Cotswold available as well (I haven't opened all the barrels yet).

Theses fleeces have a lot of crimping in them, so they are suited for heavy yarns - the type you would use for outer garments or rugmaking. Makes great felting wool too. All of the wool is white with a high lanolin content.

The sheep are "working sheep", used for hard grazing noxious weeds (an environmentally friendly way to get rid of weeds instead of spraying pesticides). As such, they aren't blanketed, and though the fleece has been skirted, the wool has a lot of VM (vegetable matter) and fine dirt particles in it. Though I must say, I personally managed to get the wool very clean with 2 soaks of detergent & 5 rinses of water - and I'm a novice. So if you want to give it a try, just let me know - otherwise keep an eye on my Etsy store as I'll put the cleaned wool there.

Wednesday, December 10, 2008

Simply Scarves - Super Simple Skinny Scarf

This next scarf is my favourite one to date for wearing just for fun. I'm normally so "granola" in the way I dress that when I fling this scarf around me & head to the bank, I sure get these weird looks from the villagers. I love being unpredictable :P

The only thing difficult about this pattern is trying to see the stitches as you knit. It's not meant to keep you warm, but to be a piece of eye candy, so that's why I opted out of using a carrier yarn (and therefore the reason the knitting goes slowly). Unfortunately, Bernat has discontinued this yarn, called Bling Bling (scarf shown in Brilliant Blue colourway), but you can still pick up some small batches of it on Ebay. All I did was cast on 16 stitches on 8.00 mm needles and knit in stocking stitch (aka stokinette stitch) until the entire skein was very close to being used up, then cast off & wove in ends. what could be easier?

Well, I'll tell you :) Add a carrier yarn along with the Bling Bling (I used Lionbrand Homespun in Williamsburg). I did this one in knit stitch only, which also added to the bulk, but I wanted a really warm scarf for my daughter. Still done with a 16 stitches cast onto 8.00 mm needles, but it is way easier to find those stitches - I think it took me under two hours to finish it, with interuptions from my kids, and I'm no speedy knitter.

Tuesday, December 9, 2008

Simply Scarves - Striped scarf

It's that time of year when scarves are on everybody's mind, so I thought I'd share some knit & crocheted ones that I've made that are simple to do. Here's the first one:

The striping in this scarf was based on a number pattern known as the Fibonacci series, which goes like so: 1, 2, 3, 5, 8, 13, 21, 34, 55, 89,...etc. Leonardo Fibonacci was an Italian mathematician who came up with this pattern of numbers to relate to what the Renaissance artists of his day referred to as "the golden ratio". The golden ratio was a term used to signify perfection, measurements that in art or architecture that were always pleasing to the eyes. The Fibonacci series is often used to show the spiral of a seashell in nature. But enough of that mathematical history lesson, and on to how the striping was done.

I used cotton chenille that was 1400 YPP and double stranded it (which made it about equivalent to worsted weight). Knitting needles size 8.0 mm. The colours used are Raspberry (R), Butter (B), Chartreuse Green (C). When I selected the order of the stripes, I changed colours after knitting a pattern repeat of 5, 8, 1, 2, 3 rows. In case that doesn't make sense, this is exactly how my pattern went:

Knit the entire scarf in stocking stitch (row 1 is knit, row 2 is purl, repeat rows 1 & 2 to end of scarf). When I changed colours at the end of the rows, I'd leave a 4" tail, and then tie the new colour to it (also leaving a 4" tail) to make mini tassles of 4 strands intermitently along the sides. This would mortify my grandmother if she were still alive - How could I not weave in the ends! - but it's my scarf, and I like it :)

Starting with R, cast on 20.
*5 rows in R.
8 rows in B.
1 row in C.
2 rows in R.
3 rows in B.
5 rows in C.
8 rows in R.
1 row in B.
2 rows in C.
3 rows in R.
5 rows in B.
8 rows in C.
1 row in R.
2 rows in B.
3 rows in C. Repeat from *twice and cast off

Friday, December 5, 2008

Update to the Tea & A Cup of Crochet Website

I've finally done it - I've got my Tea & A Cup of Crochet website up and running in a way that I feel good about. My biggest hurdle has been getting over my own perfectionism & just "gettin' er done". If you like crochet, just pop on over to the site, where I have a free crochet pattern of this Lemon Blossom Motif to download:
I hope you enjoy it - this would make a nice & quick little decoration by itself for any of those last minute crafting needs you have :)